
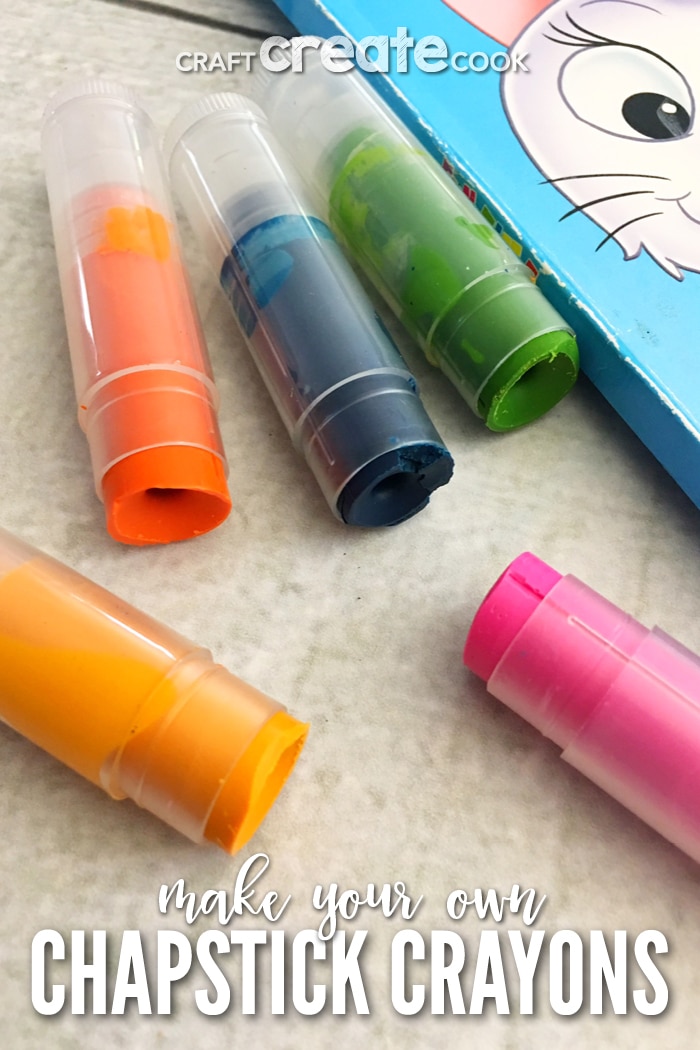
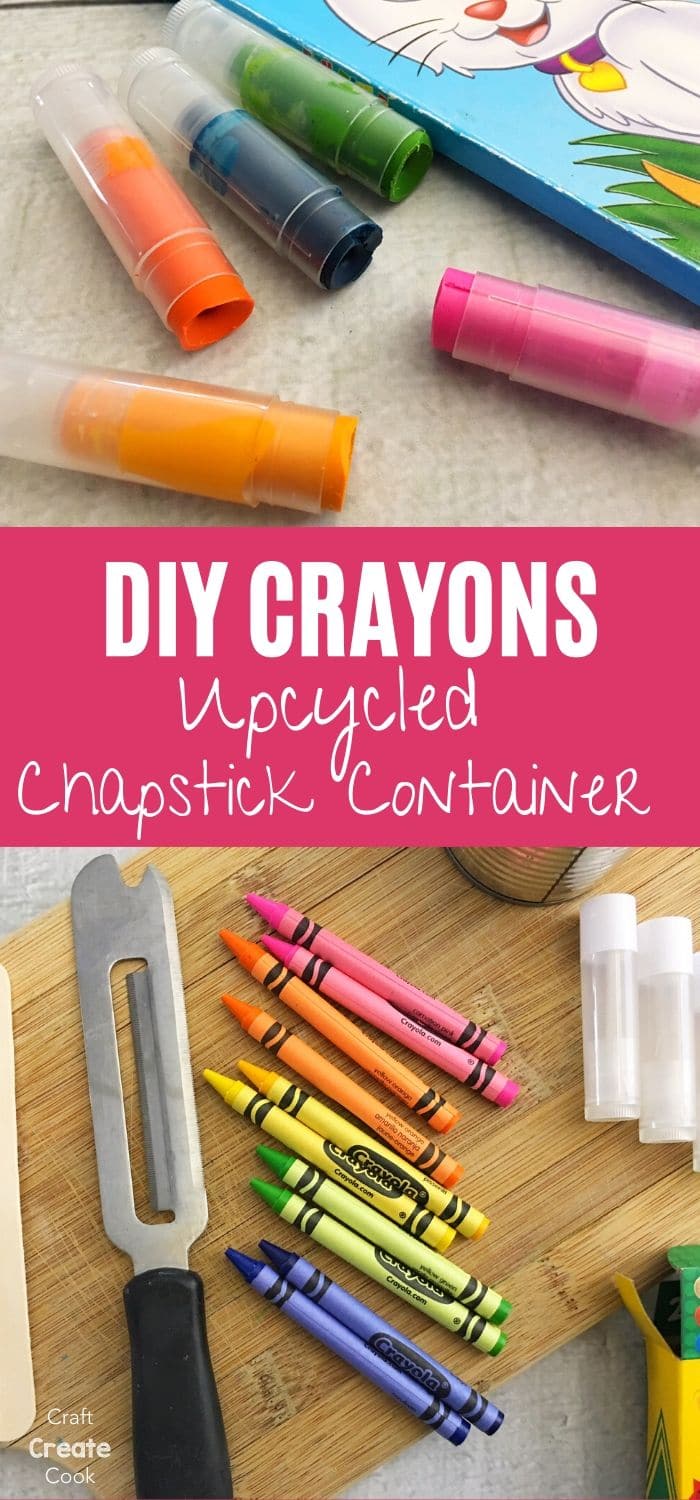
I'm so excited to share with you how to make crayons in old chapstick containers! This is a brilliant way to make crayons that won't break off in your purse but are easy to take along when going out with kids.
Every time we go on a road trip I always pack my son's backpack with a book, an electronic device, a few snacks/drinks, and a notebook with colored pencils or crayons. I always love it when I see him grab his crayons or colored pencils instead of his electronics. Creativity is something that I love and love when I see the kids enjoy it as much as me.
Why Use Homemade Crayons?
Having crayons in the car or in my purse scares me a little. I am always cautious and thinking they could get on something that I don't want them on. Nothing is as yucky as cleaning up crayons on fabric!
So, that's why I decided to make them in chapstick form with lids. That way when they put them away I know that they will be good. They are super easy to make too, which makes me happy.
One of the other great benefits of making homemade crayons is that you can use up any bits and pieces your kids have broken before. If your kids are a bit rough on crayons like mine, then this will cut down on broken pieces in the process!
Can I Use Old Empty Chapstick Tubes?
I linked out to my favorite empty tubes on Amazon, but if you have saved old tubes and cleaned them out from lip balm, you can easily use those instead. In my house, those empty tubes usually end up in the trashcan before I can salvage them. Plus, it's hard to go through enough chapstick or lip balm to provide the number of tubes I need for this project!
How Should I Store These Homemade Crayons?
While I mentioned that I prefer these as they have a lid and can save your purse or bag from stains, you still may want to put these in a bag or pouch.
Here in Michigan, the temps don't get hot enough to melt crayons very often, so I don't worry about them melting in my purse. That said, other states may have that issue. So, a little purse or pouch is a great idea for keeping these tucked away safely in your car, the trunk of the car, or your own purse.
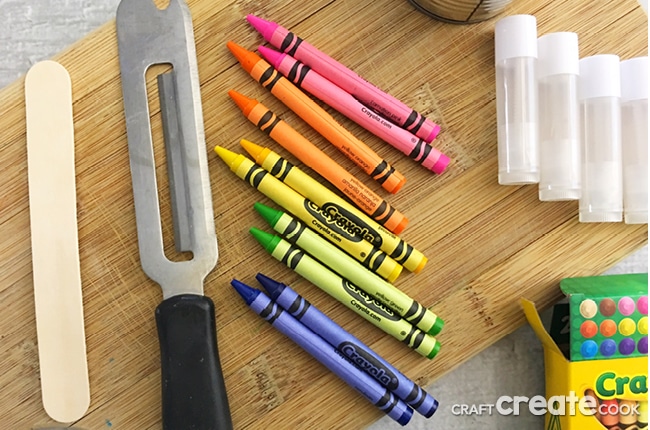
Supplies Needed
- Empty chapstick tubes
- 2 24 ct. boxes Crayola crayons
- Craft sticks
- Empty and clean soup cans
- Knife
- Sauce pan
- Hot pad
How to Make Crayons in Old Chapstick Containers
Below are simple directions for you to make these easy and fun homemade crayons. These are absolutely ideal for kids who tend to be a bit too rough on their colors. Grab your supplies and make a batch for your kids!
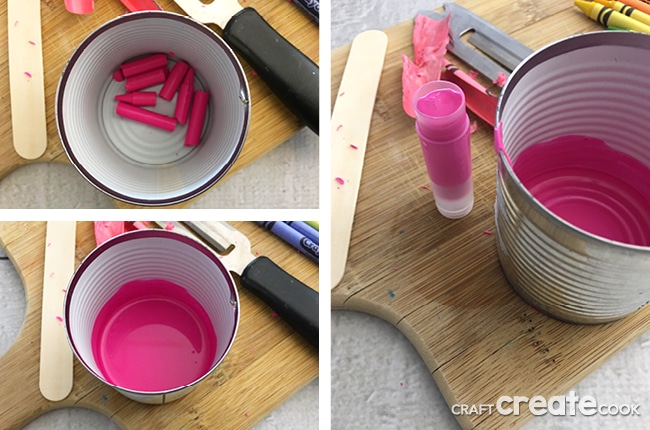
- Carefully score two of each color crayon on a cutting board with a cheese knife (you can control it more) and peel the crayon wrapper off.
- Break your two crayons in several pieces and place them into your clean soup can.
- Place your soup can in a small saucepan of boiling water, stir your crayons with a craft stick as they melt.
- When the crayons are fully melted, carefully remove your can from the water, and carefully pour the melted crayon into an empty chapstick tube.

- Let your Chapstick Crayons set for about 30 minutes before using (place in the refrigerator for a faster cool time).
- Repeat steps 1-6 with each color crayon that you'd like.
Need More Kids Craft Ideas?
Don't let your kids get bored during their time at home. We have tons of amazing ideas to keep them, and you busy. Below are a few of my favorites that I know you and your children will love!
Our DIY Chapstick Crayons for Kids are perfect for trips and taking to restaurants.DIY Chapstick Crayons for Kids
Ingredients
Instructions

Raquel
Wow great idea, I wonder if the same can be done with empty glue stick containers