
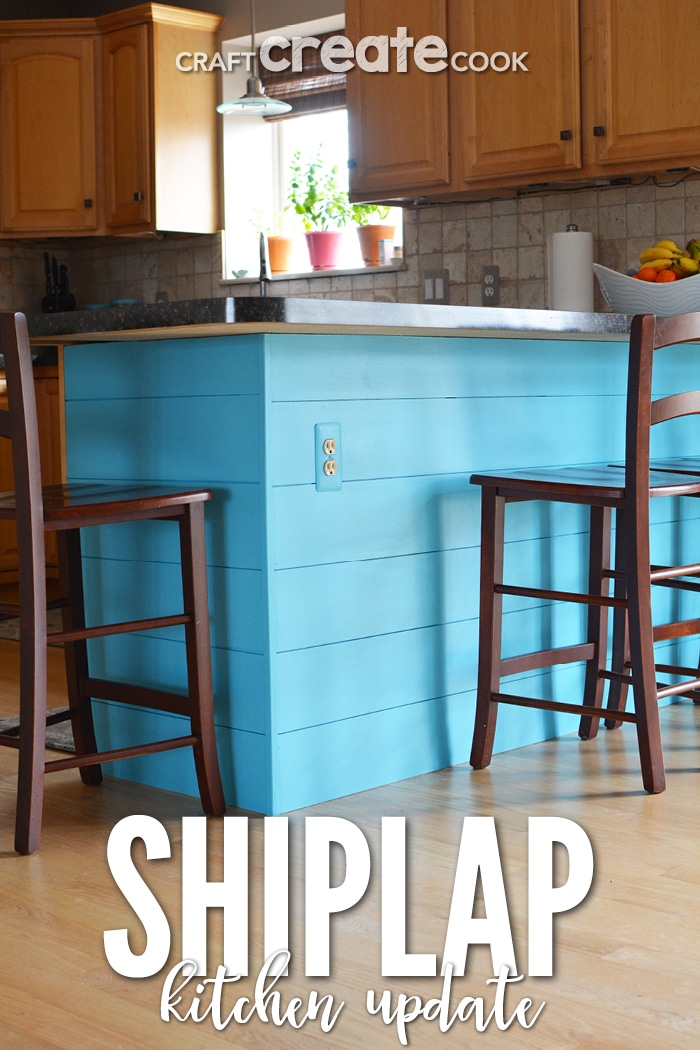
My shiplap kitchen update was a quick weekend project that almost anyone can complete!
When I moved into my house almost 2 years ago I knew I wanted to update part of my kitchen that was not-so-great. I'd say it was ugly, but hardly anyone noticed unless I actually pointed it out.
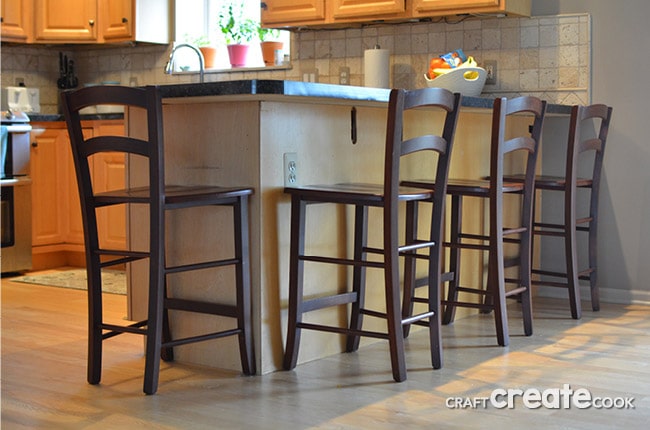
My U shaped kitchen had actual cut outs in the back of the cabinets. I was able to ask the previous owners why they cut out part of the kitchen and they let me know they had a clip on chair for their daughter attached to the bar and they cut out that space for the chair.

I had to hop onto the shiplap band wagon when I started to see it pop pup across the internet. Now I'm not sure if the shiplap wave started with a certain power couple or what, but I have to admit shiplap is pretty amazing. I love the look no matter where it is. So I knew I had to have it in my kitchen, it is the perfect cover up for my kitchen situation!
Please Note: I was able to get my wood cut at Lowe's which was very nice and cost nothing. Now, not all the boards are exactly the same size, so if you work on a large area that requires two boards, you'll need to make sure they are cut exactly or you'll have a hot mess. I'd recommend cutting them yourself so you know they are the same size, and you'd need a table saw. Otherwise, search for pre-cut boards that are exactly the same size.

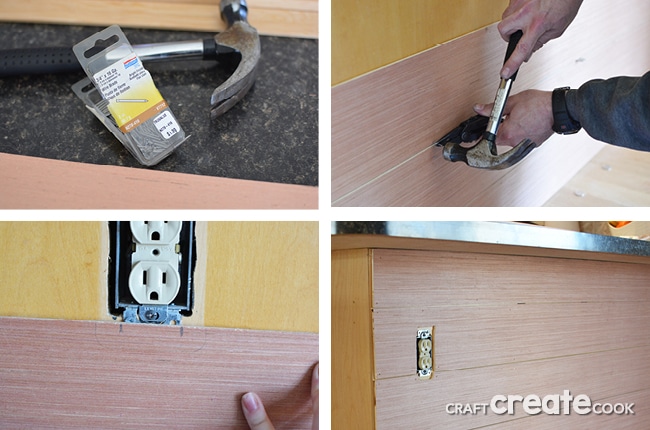
You do not need an air nailer for this project. You can easily use a standard hammer and finishing nails to get the job done. It may take a little longer, but will certainly work just as well. You can use pliers to hold the small finishing nails in place (see photos below).
DIY Shiplap Kitchen Update
Materials:
- Plywood Underlayment also known as Laun or Lauan (these were 4' x 8' sheets cut to 6" x 8' at the store)
- 2 tubes Liquid Nails (Now if we knew what we were doing, we maybe would have only needed 1)
- Caulk Gun (Don't buy one! Ask around, I'm sure a neighbor or co-worker has one you can borrow)
- Corner Trim
- Wall and Floor Trim, if desired. (I bought this trim and didn't use it.)
- Primer & Paint
- Paint Brush and/or Small Roller
- Sand Paper 220 grit
- Jigsaw (You only need this if you need to cut out special areas, such as areas around an outlet or around trim. Ask to borrow one, you'd be surprised who would be more than willing to let you use yours)
- Circular Saw or Table Saw (See this tutorial on how to cut wood with a circular saw)
- Several Nickels
- 1" finishing nails and air nailer or hammer
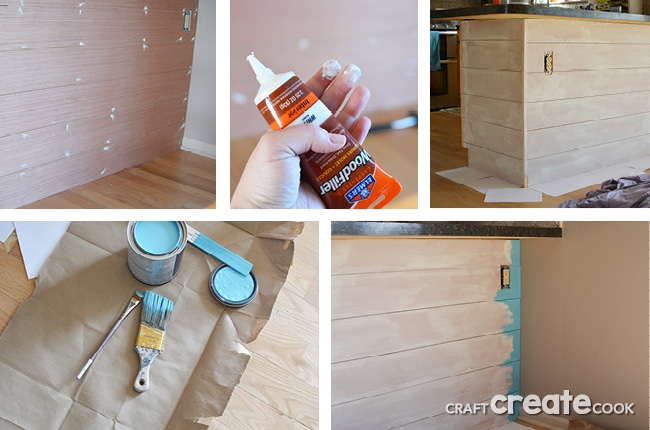
- Paintable Wood Filler
- Painter's Tape (if desired)
- Paint color of your choice (I used a satin finish)
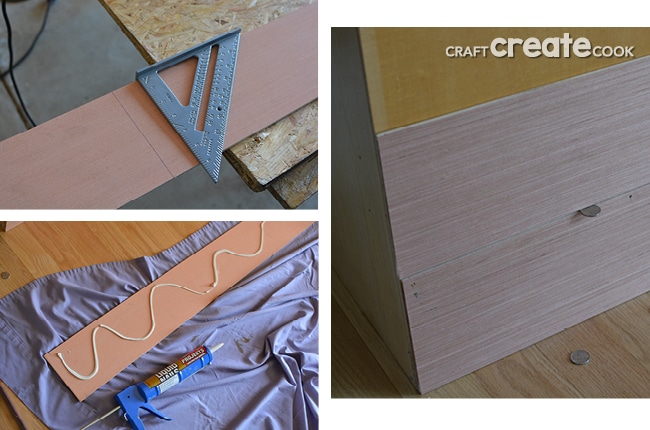
- Place your first board on the bottom of your wall. Use a pencil to mark where to cut the board and trim it using a table or circular saw. Lightly sand the board with sand paper.
- Spread liquid nails onto the back of the board and press firmly onto the wall. Add finishing nails to the board to secure it in place. Nail about 8-12" apart on the top and bottom of the board.

- Repeat with the second board and as you place the board onto the wall, place several nickels on the top of the bottom board as a spacer. Leave the nickels in place and press the board firmly onto the wall. Attach with finishing nails.
- Repeat this pattern along your entire wall. You'll need to use your jigsaw to cut out any molding or outlet pieces. It's often best to draw a template out of paper and trace the template onto the board with a pencil. It may take a few template tries, and that's okay, because it's better to waste paper than it is wood!
- For the top piece on my "kitchen situation" I had to cut the 8' board using the circular saw guide that came with my saw. I trimmed the piece to fit the space and attached it just as the other boards.
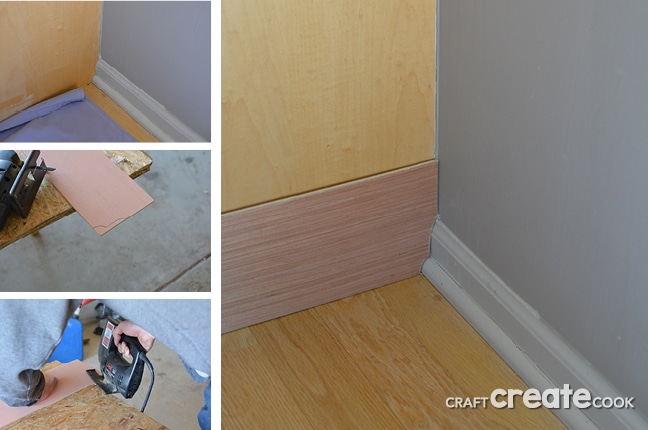
- Once I finished the long side of the kitchen, I continued onto the short side. Once all boards were attached, I added a corner piece to finish the corner. Measure and cut with a circle saw, lightly sand and attach with finishing nails.
- When complete, cover all nail holes with wood filler. I used my finger to press the filler into the nail holes and smooth away. It seemed to work quicker than using a putty knife. Let dry completely and gently sand smooth.
- Wipe off your wood with a dry cloth and prime it. Follow with 2 coats of paint. You may notice, that I didn't use any rollers for this project. I used a 2" brush. I also don't tape any walls and I use a very small craft paint brush to cut into the small areas. I don't like to tape because it takes too long and somehow paint always gets under the tape. I freehand paint and then I can see my mistakes right away and fix them. You are welcome to use tape to protect the surfaces surrounding your wall.
- Let dry and enjoy your new shiplap kitchen update!
Check out some of our other DIY projects:


Leave a Reply