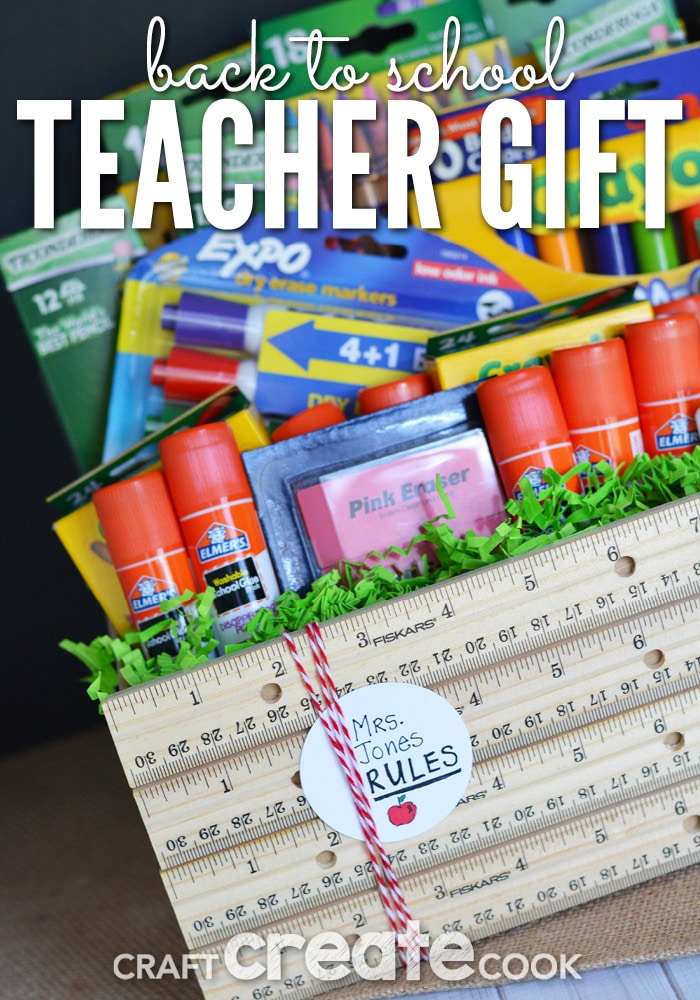
This back to school teacher gift is perfect to show your appreciation for all the hard work your teacher does!
I might be a teeny tiny bit addicted to nabbing the back to school sales at the stores. I always tend to stock up on pencils, markers, crayons, glue and whatever else might catch my eye. This year I decided to make a teacher gift box full of supplies for the first day of school.
I'm so excited to share this tutorial, I'm just going to dive into what you'll need!
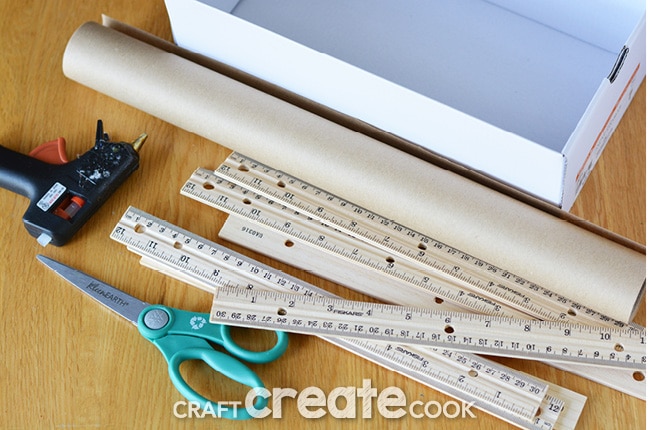
To make the ruler box:
- shoebox
- kraft paper
- rulers (I used 4)
- hot glue
- 2" circle punch
- white card stock
- red baker's twine
- sharpies or markers in black, red and green
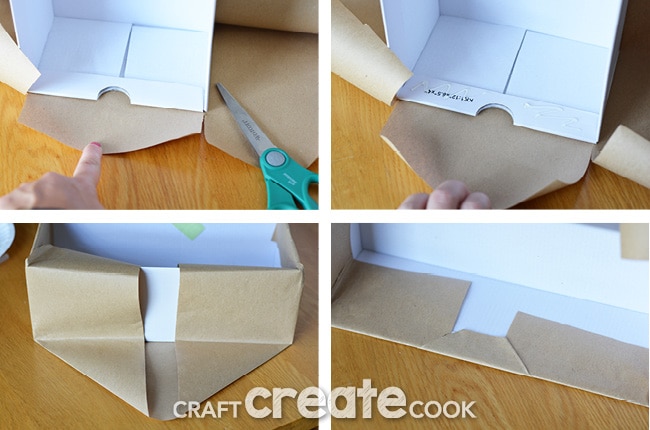
- First you'll need to cut the kraft paper so it fits around and a little inside your shoebox.
- Starting with the ends, stand your box upright. Cut two slits in line with the box and add some glue to the box. Fold the paper in and affix with glue. Repeat on the other end, keeping the paper as tight as you can.
- Now work on the long sides of the box. Fold the outside pieces of paper in and crease them tightly. Fold everything to the top of the box and over the edge and affix with hot glue. Repeat on the other side.
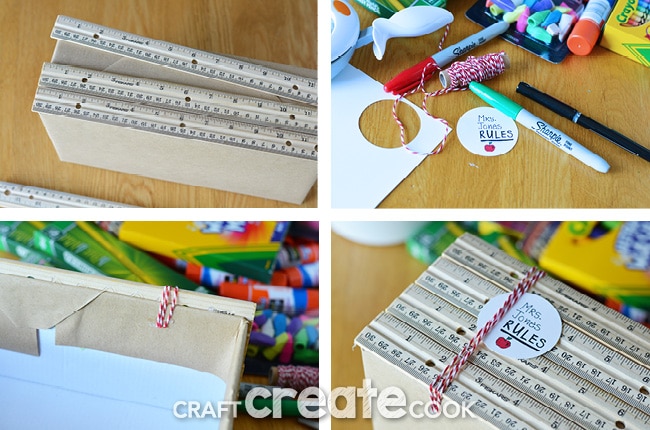
- Add the rulers with hot glue. To place the first ruler, set your box on the table and add hot glue to the ruler. Use the table top as your "level" to place the first ruler and keep it straight. Add the ruler to the box and let set for a minute so the glue adheres. Add the remaining rulers. My top ruler extended beyond the top of the box about ½".
- Use your circle cutter to cut a circle out of white card stock. Add your teacher's name and a cute apple.
- Cut 3 strands of baker's twine about 3" longer than the height of your box. Cris-cross the strands and attach to the inside top of the box with hot glue. Stretch the strands of twine to the bottom of the box and add a dab of hot glue to hold the strands together.
- Slide the circle tag under the strands of twine and attach with a dab of hot glue.
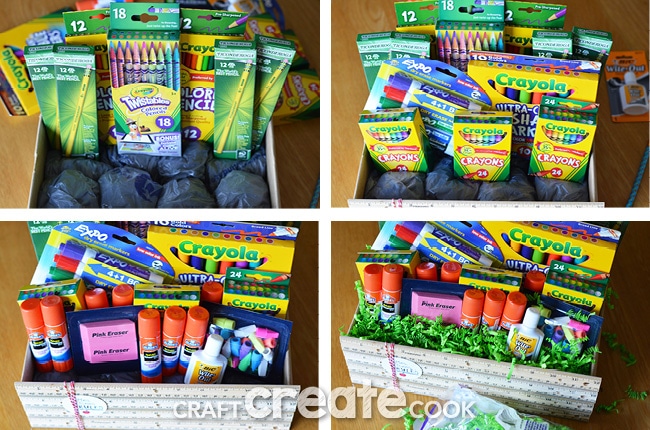
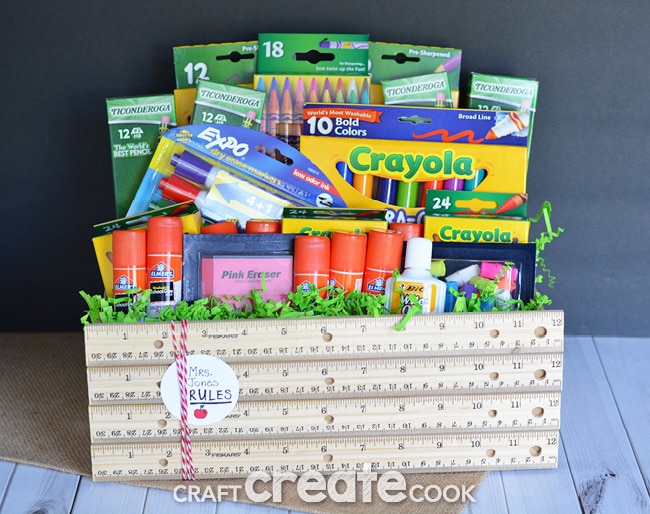
Now it's time to fill your box! This is my favorite part and can sometimes be the hardest. There's no right or wrong way to fill your box. Just remember, stuffing is the key and the taller items go in the back!
My box included the following items:
- 4 boxes of Ticonderoga Pencils
- 1 box Crayola Washable Markers
- 2 boxes Crayola Colored Pencils
- 1 box Crayola Twistables
- 1 box Expo Dry Erase Markers
- 3 boxes Crayola Crayons
- 8 large Glue Sticks
- 1 bottle White Out (I removed this from the package)
- 1 package Pink Erasers (I cut the top off the package)
- 1 package Pencil Top Erasers (I cut the top off the package)
- 8 plastic shopping bags
- green paper stuffing
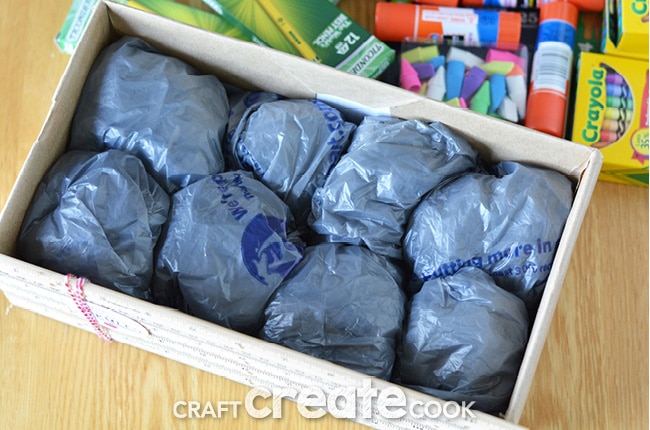
- Start by placing eight plastic shopping bags in the bottom of the box. Lay your bags somewhat flat and roll the corners into the center to create a ball. Place the ball into the box, fold side down and repeat until the box is full.
- Fill your box by layering the tall items in the back and moving from the back of the box to the front. If necessary, push down on the plastic bags so the items stand up better.
- Finish by adding the smaller items and then tucking green paper stuffing into the front of the box to fill the space. And you're done!
Don't you just LOVE it! I'm sure any teacher who receives this gift will also love it! Full of supplies they need and can use. Perhaps you'll give it to the teacher halfway through the year as a teacher appreciation gift and a good way for him or her to replenish classroom supplies. Or maybe as a classroom gift for Christmas! No matter when you give this back to school teacher gift, it will be greatly appreciated!
And if you think this is neat, check out a few other things we've made like this Graduation Gift Basket.

Erica Peruski
I am a teacher and I would love getting this from a family! Amazing idea and great product selection!
Kari
Thank you! We love it, too!